Page 1 of 3

took delivery today !!!!

Posted: Wed Apr 22, 2009 10:52 pm
by kevin babineau
took delivery to day of the f36....lot of work ahead of me.l..i pray that this forum has a of patience with me bc ill be asking for lots of help lol...thanks in advance!!!!

some pics the trojans in there somewhere


http://s557.photobucket.com/albums/ss15 ... =slideshow

boat

Posted: Thu Apr 23, 2009 6:48 am
by g36
nope no patience for that.

hmmmm. okay maybe a little.
you definetly have some fun coming your way. but thats what were all about. right?
congrats on the boat.

Posted: Thu Apr 23, 2009 6:53 am
by prowlersfish
Good luck with the new toy !

Posted: Thu Apr 23, 2009 7:50 am
by jwrape
WOW! You have your work cut out for you. Good Luck

Posted: Thu Apr 23, 2009 8:31 am
by randyp
Lotsa work ahead of you, but what the hell, you weren't figuring on having a life after you got that F36 were you?

Congrats and enjoy the work.

Posted: Thu Apr 23, 2009 8:36 am
by jwrape
randyp wrote:but what the hell, you weren't figuring on having a life after you got that F36 were you?

Congrats and enjoy the work.
Exactly!

I say you strip out all the bad, CLEAN the hell out of it. All the paint chips, all the trash and get EVERYTHING out of your way and nice and cleaned up, only then you start repairing things.... You will feel a lot better about the project if it's all clean before you start on it.

Usually when i buy a P.O.S. car project, I always feel so much more energetic about the project if it starts out cleaned up....

Just my 2 cents
Good Luck!

Posted: Thu Apr 23, 2009 9:01 am
by jwrape
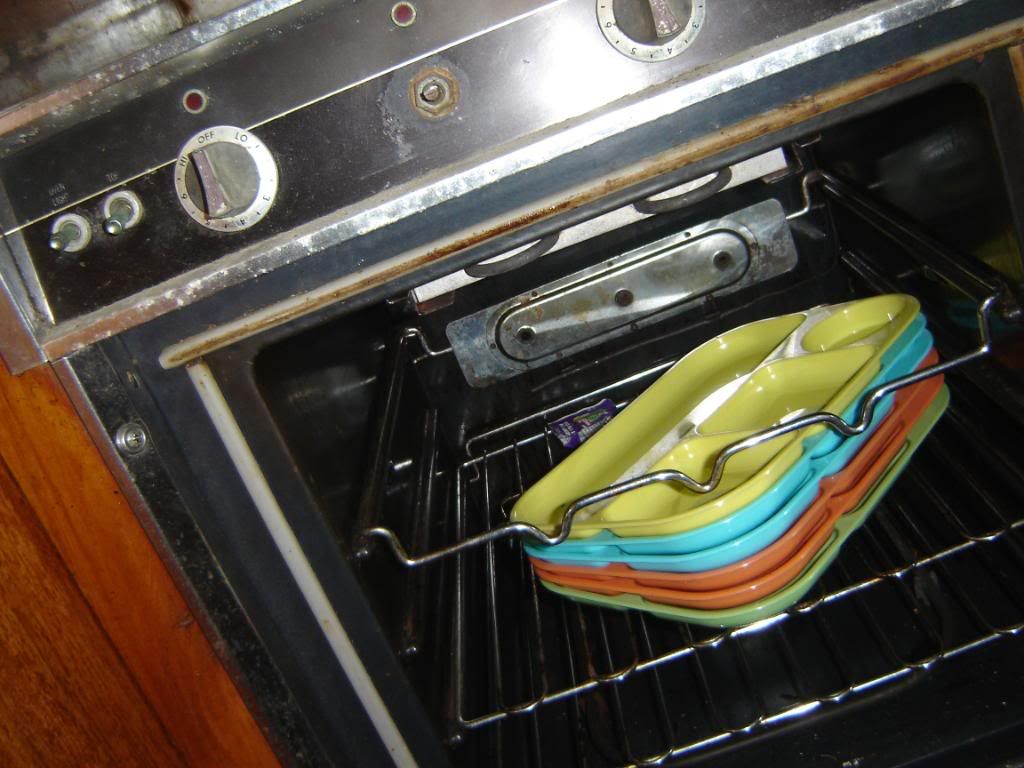
At least you got some nice china with it
Image

Vacuum this
Image


This will scub up clean pretty easily
Image


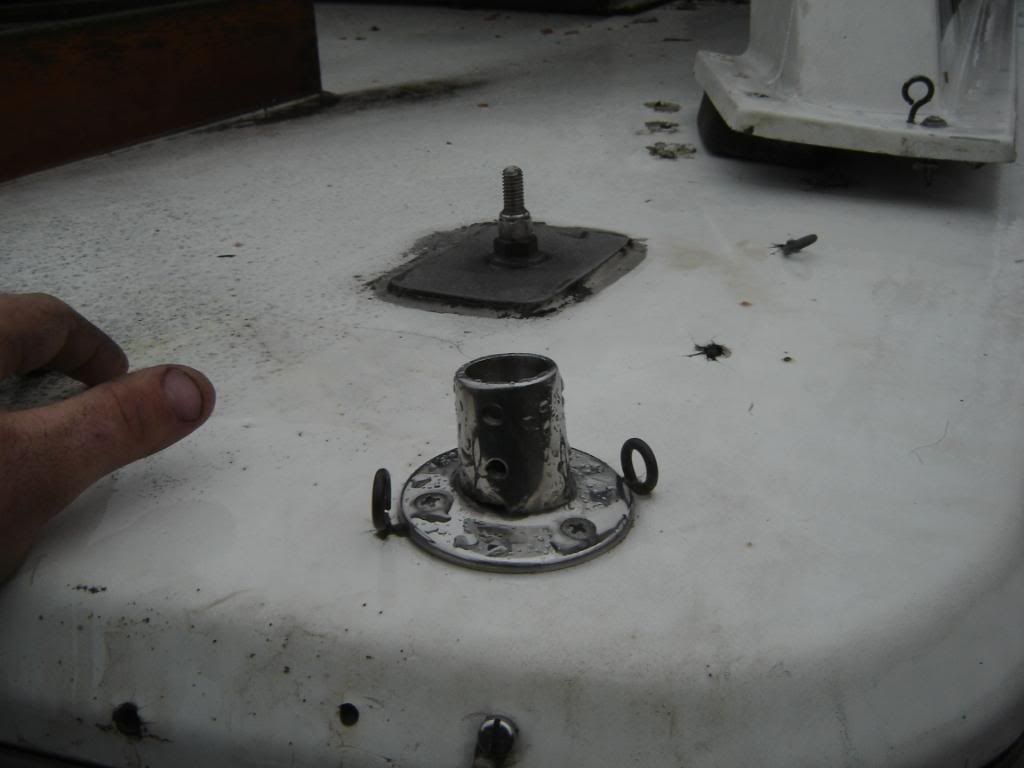
I wonder what the eye hooks are here for
Image


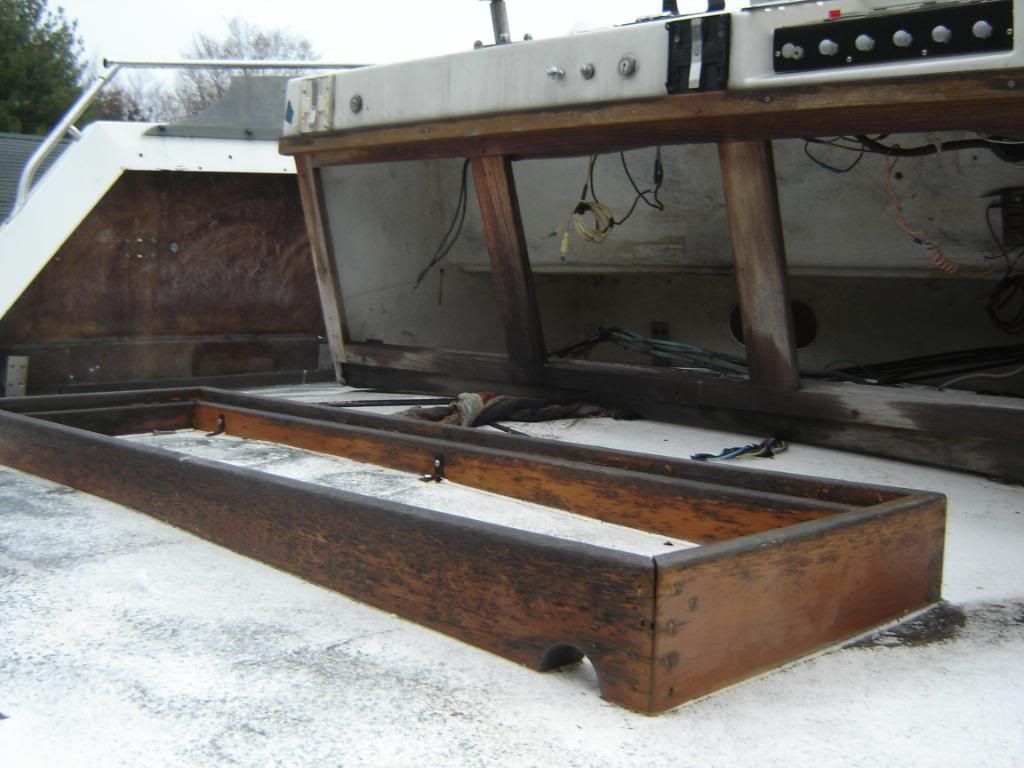
Looks like the wood for the seat base is in decent restorable shape

Image

A good pressure washing and a little paint for the wood and this will prolly look new. Do the motors run? How long have they been sitting???
Image


Everything looks intact in the engine compartments
Image

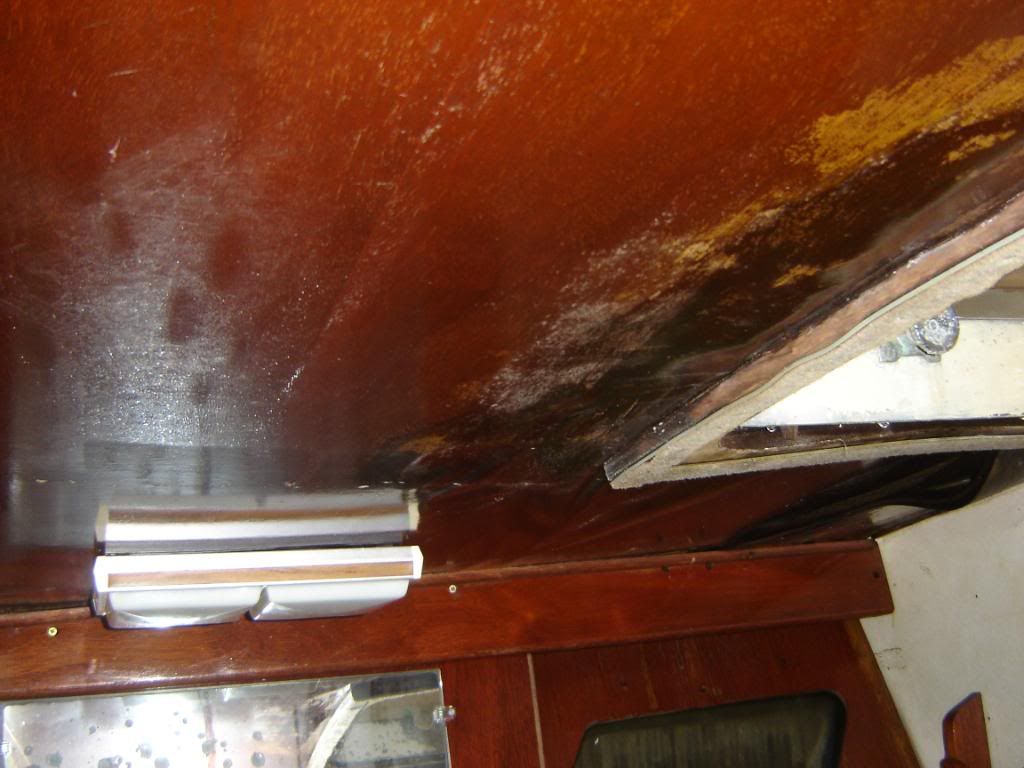
Sanding and then Spar Varnish would make this wood look beautiful again
Image


When my Tank goes in my 74' F44 I plan to replace it with a Tankless Water heater for less weight and more space in my Beldge. Think about it, could be a good idea for you as well
Image

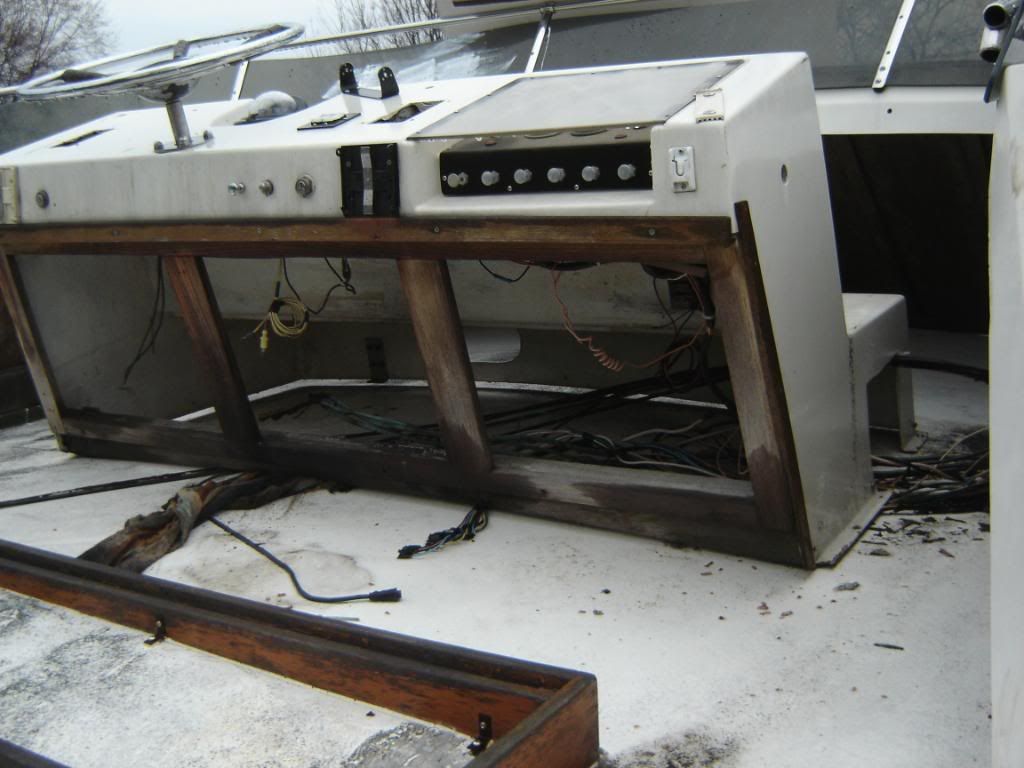
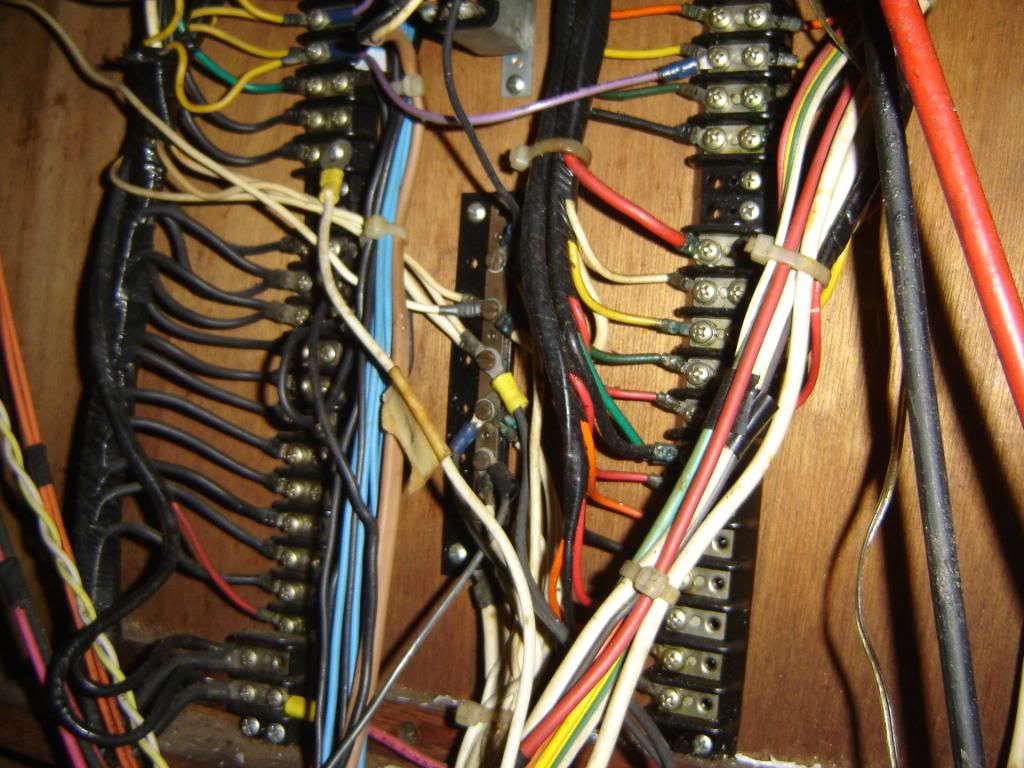
At least your wiring looks decent. I'm still finding places where the previous owners have wired multiple recepticles and lights on a single extension cord wire. :shock: :shock: As i find them I replace them with good 14/2 wire
Image

Ewww

I hope this will come out.... You can at least cover it with the vanish and it would not look as bad. Don't know how you would replace it without a lot of ripping out
Image

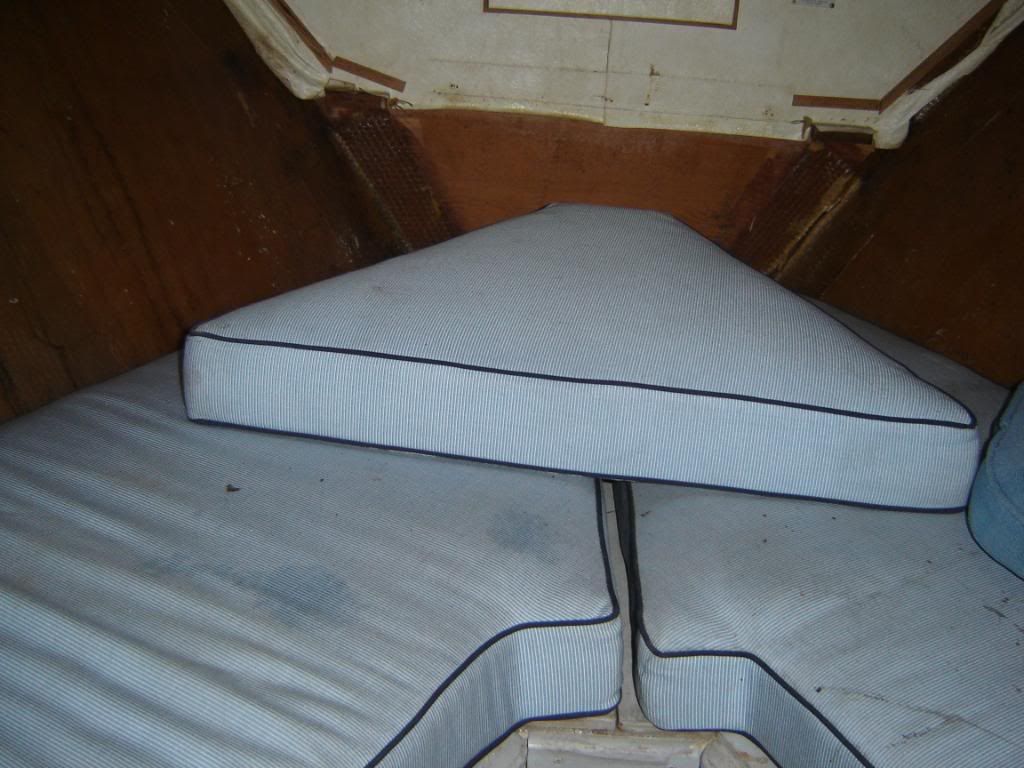
Cushions look like they would clean up nicely. Through those covers in the wash in gentle and all those little stains would clean right up.
Image

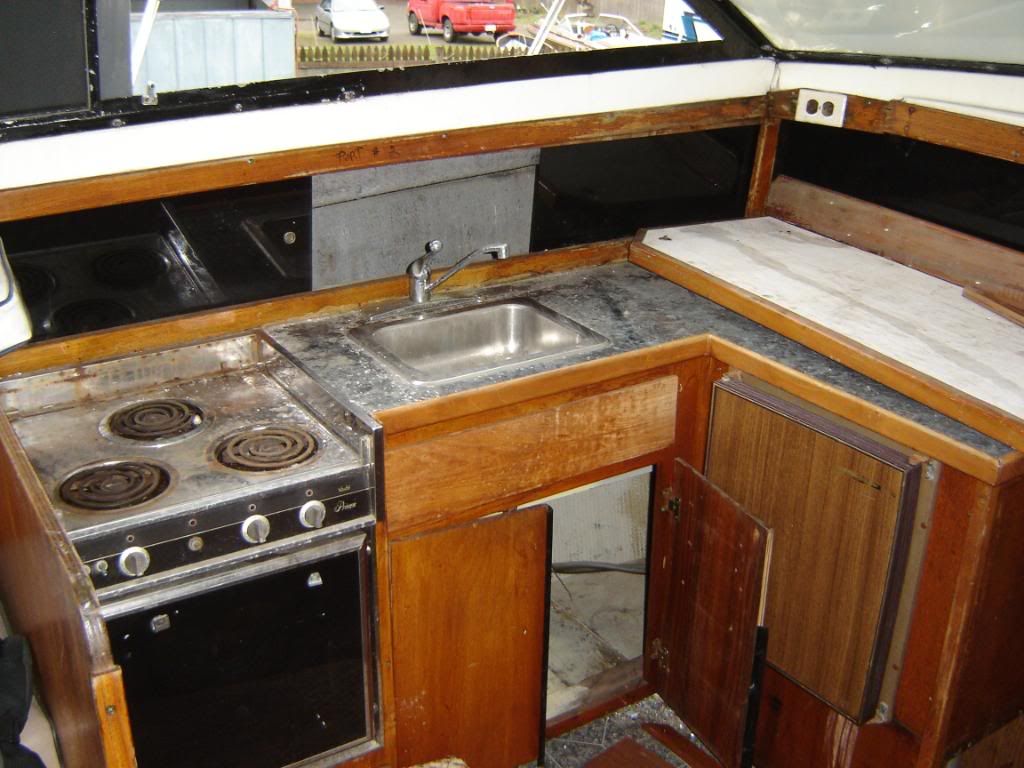
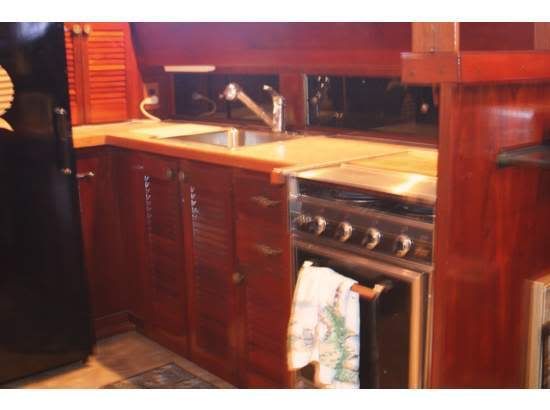
New up to date fixtures and counter top in here and it would look nice
Image

I see some steel wool in your future. :D Paint the fridge front black to match the stove...
Image

Nice love seat would fit perfectly here
Image

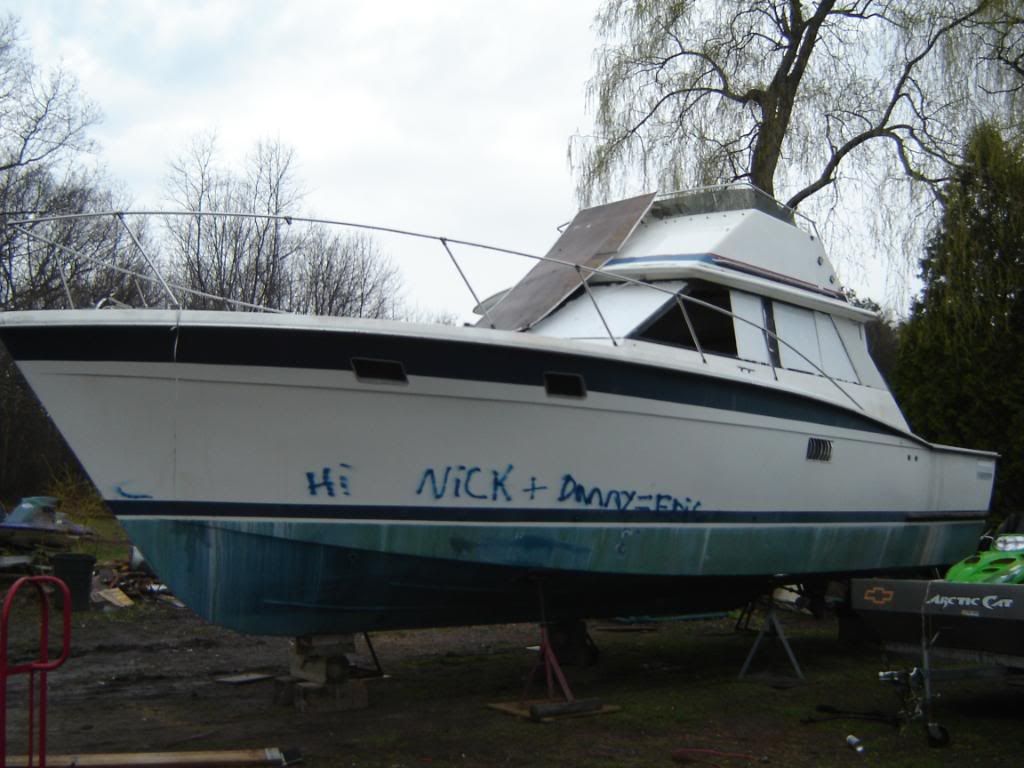
Who's Nick and Danny???? :lol: You can prolly buff Nick and Danny right off the GelCoat and bring up the shine. I just had my Oxidized hull brought back to life with a lot of elbow grease.... :wink:
Image

I tell you what, I'll come over and get this started for ya.... After looking at it all it looks like a lot of fun. Theraputic<(spelling) to say the least


Seriously,
How is the hull? Any scares or holes?? Looks like a lot of fun if you have the time.... The end result would be VERY nice with a lot of handywork....

But really, clean it first and it will look great. Some people would look at that and see a piece of crap, but under the dirt and grime, there is a jewel waiting to be polished.


Looks like the motors have had a recent tune up.

OH, wait, where is the GenSet... is it missing, didn't see one.

Refurb of a F36

Posted: Thu Apr 23, 2009 9:03 am
by ready123
Enjoy the work... you have certainly taken on a lot. I hope you have the money and time to get it to a conclusion.
I also hope your intent is to keep it for yourself... if you are planning to sell be prepared that you will not likely get back the money you put in let alone the money you spent to get her. Those of us who want Trojans are usually well aware of the costs of having one and that consequently keeps the true value price down. I see higher priced Trojan's on the market for years. I have seen a number in my area asking 10-15 K too much and by holding out for that price in the hope that prices will go up (very rare situation for anything IMO) the owners end up keeping them and paying for storage year after year.... some don't even use them!

Looking at the photos of the underside of foredeck ahead of the windshield it looks to me like signs of moisture.
Are the decks spongy/soft? Take a rubber/plastic hammer and go over the top decks listening for dull sound rather than crisp ping when you hit the glass quite firmly. Any dull sounds suggests wet decks 'feature' :wink: of old Trojans.
Not difficult to fix but does take time and a specific procedure to obtain good results. I am still a fan of using the original design crosscut balsa core rather than any of the newer materials. If they are wet I would suggest you start replacing them before anything else.
Key is to do it in sections to maintain rigidity, 4 sections at least on fore decks.
Here's some photos of my F32 deck recore in progress 2 yrs ago...
Image
Here are more:
http://www.flickr.com/photos/32233258@N ... 792002787/

Posted: Thu Apr 23, 2009 9:10 am
by Stripermann2
Wow...it's a shame to see a Trojan in that condition.
Be a labor of love to restore it. Good luck!

Can I have a copy of the picture of what's left of an outdrive on the rock?

Thanks.

Re: Refurb of a F36

Posted: Thu Apr 23, 2009 9:11 am
by jwrape
Wow, you do good work.... Nice F32... My Dad used to have a beautiful F32 Motor Yacht. He sold it for the F44 but I miss that boat... It's still a few docks over from us but the owner never takes it out except on Holidays :(

Posted: Thu Apr 23, 2009 9:22 am
by randyp
Great pictures of rehab work you did. Wish you had some shots of how you finished the texture for the non-skid. How did you:

1. Cover the replaced core?
2. Get the textured finish to the non-skid areas?

Posted: Thu Apr 23, 2009 9:23 am
by jwrape
Here is few of the only pics I have of the inside of the boat after my Dad Spar Varnished all the interior Teak.

This stove look familiar? It has a cover on it but it's a 3 burner like yours :D
Image
Image

I need to take more pics, but it's really gorgeous.
I have to start re-varnishing the front Teak that sets in the sun. It's starting to flake now after 4-5 years.

Posted: Thu Apr 23, 2009 9:24 am
by jwrape
randyp wrote:How did you:
2. Get the textured finish to the non-skid areas?
Yea, what product did you use? i need to re-do my non-skid areas as well

Re: Refurb of a F36

Posted: Thu Apr 23, 2009 9:29 am
by ready123
jwrape wrote:
ready123 wrote:Wow, you do good work.... Nice F32...
Thanks she is looking better every day.
Can't take credit for the topside work.. as I needed front and side decks and aft stringers I decided to use a Pro shop, they compeleted it over the winter. They also did it extra strong according to my surveyor in that they put extra glass & epoxy making it stronger than it was originally. Now to watch closely and keep it dry.... as I plan to use it for many more years.
Did not have the time nor inclination to do that Volume of work. I do everything else where I can, though I don't hesitate to use a pro where I can see the advantages eg: Onan genny service. :wink:
I prefer to spend my time enjoying the boat rather than working on it so longterm projects just don't turn my crank anymore. At my age I feel I have earned the taking life easy role. :wink:

I certainly would not take on the work load that Kevin has... wish him luck and hope that he keeps motivated during this 2 yr project (my estimate).

Posted: Thu Apr 23, 2009 10:18 am
by ready123
randyp wrote:Great pictures of rehab work you did. Wish you had some shots of how you finished the texture for the non-skid. How did you:
1. Cover the replaced core?
2. Get the textured finish to the non-skid areas?
Our intent was to use everything as original and wanted to stay fibreglass gelcoat finish rather than the paint route for longevity gains and wear resistance.
The steps were as follows, doing no more than half width of the deck at a time, all hatches removed:
Top gel removed using rotary saw and discarded. The wet balsa was chiselled out to reveal bottom fibreglass layer (cabin roof). Resin was poured on this base and the crosscut balsa was then pushed into place in this wet bed. The balsa was then covered with resin and then several sheets of fibre matte were resinned onto this. Once all sections were done 4 or 5 to cover the bow and the side decks too then several coats of gel were applied.
The non skid was just non skid gel that was applied with a pebbled roller after masking the area. The roller was like what one would use for doing a stucco ceiling.... it siply leaves clumps of strands of gel on the surface thus giving non skid grip.
I actually like the look over diamond cut non skid or the ruff sandlike versions I see on many boats. eg:
Image Let me know if you have anymore questions.