Page 1 of 1
Side bolster recovering and rear seat ideas
Posted: Wed Sep 05, 2012 5:56 pm
by BarryL
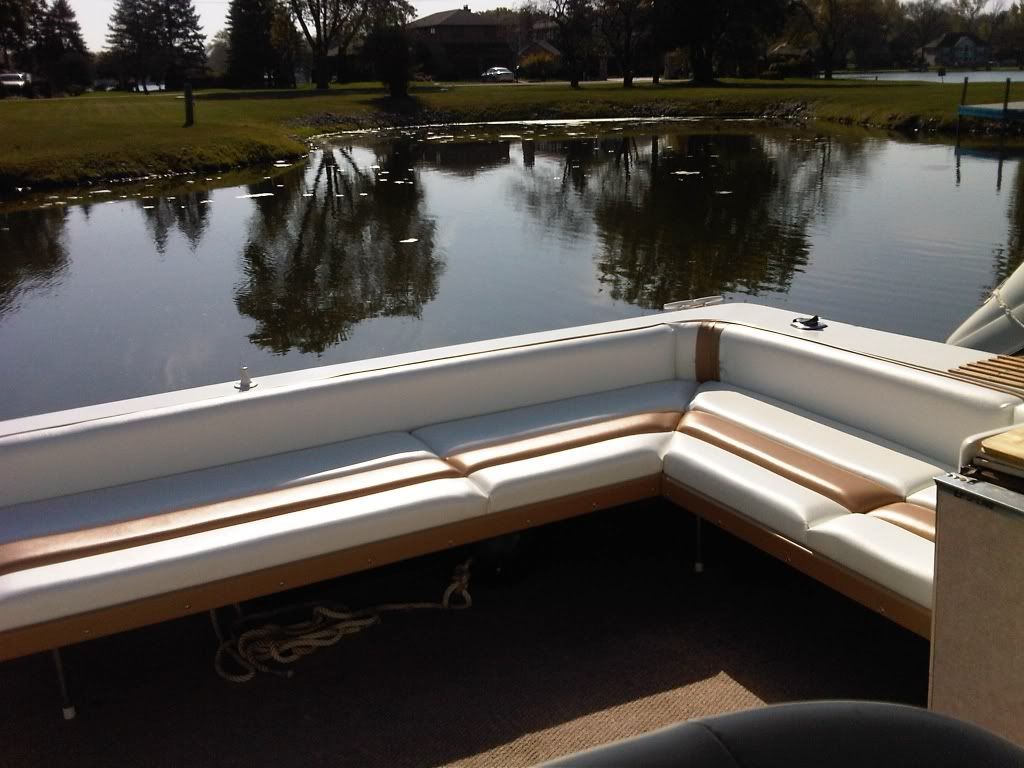
In a recent post someone I offered to post pictures of the work I had done to recover my side bolsters and make some new rear seats. I am not a fisherman so lounge seating for a large group was my priority along with getting rid of the tired old side bolsters.
The work you see was all done by me and my 13 year old son using vinyl from Jo Anne fabrics, some MONEL (rust proof staples), an electric T55 stapler, a lot of new foam, some contact cement, and a few cuss words along the way.
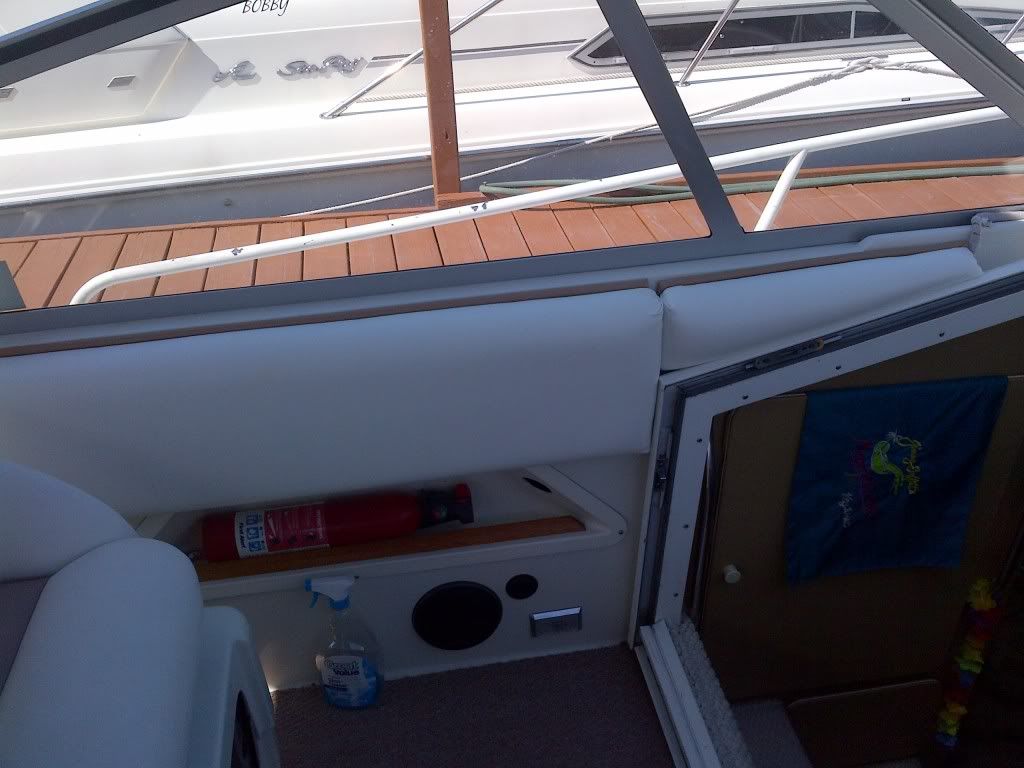
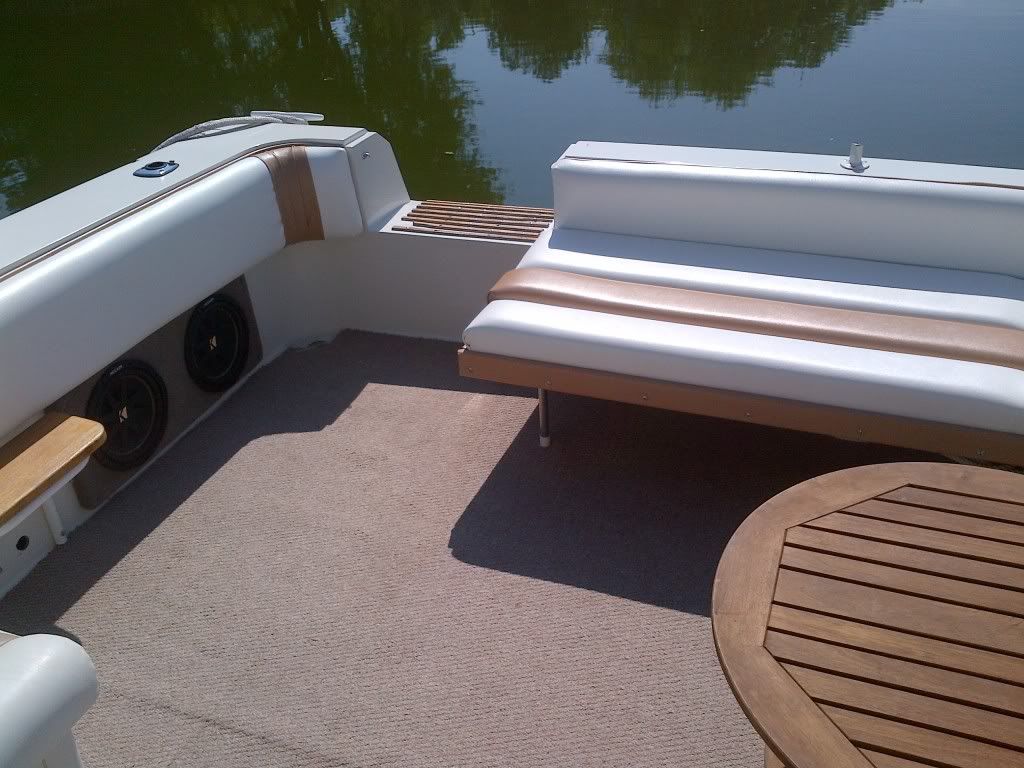
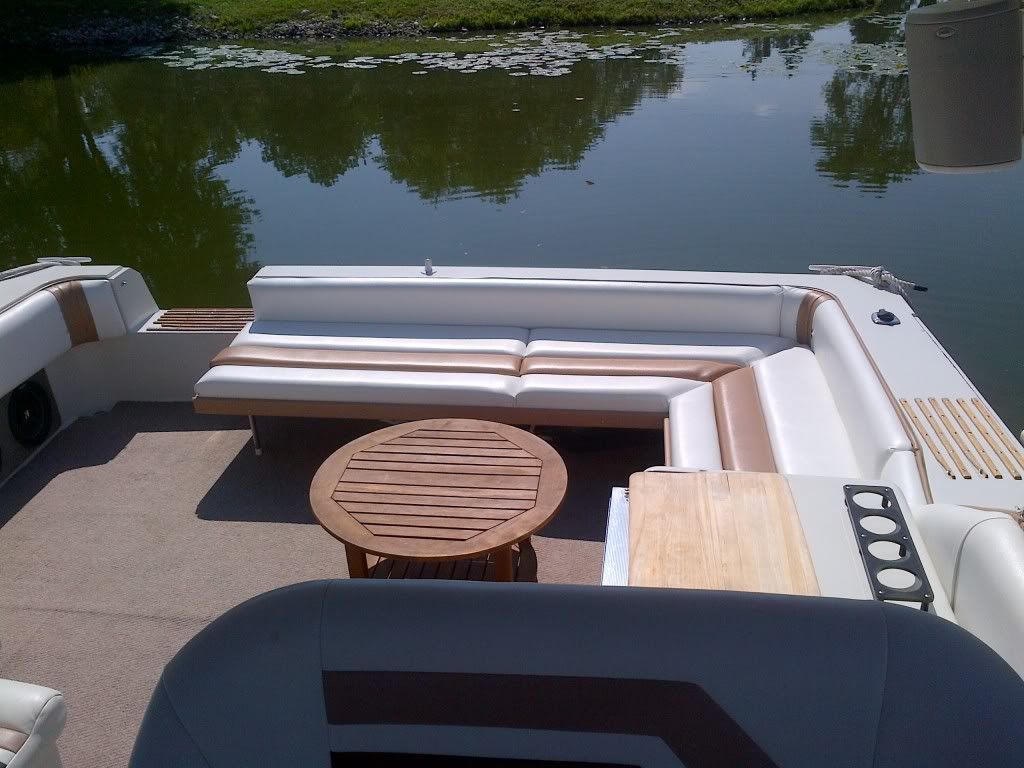
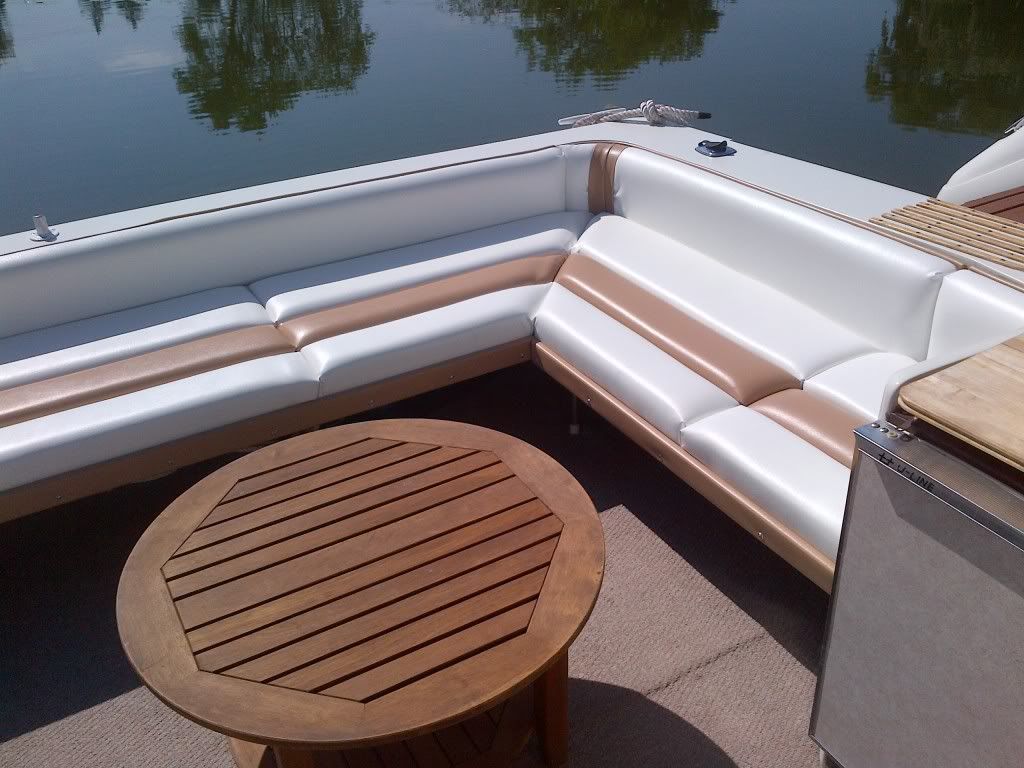
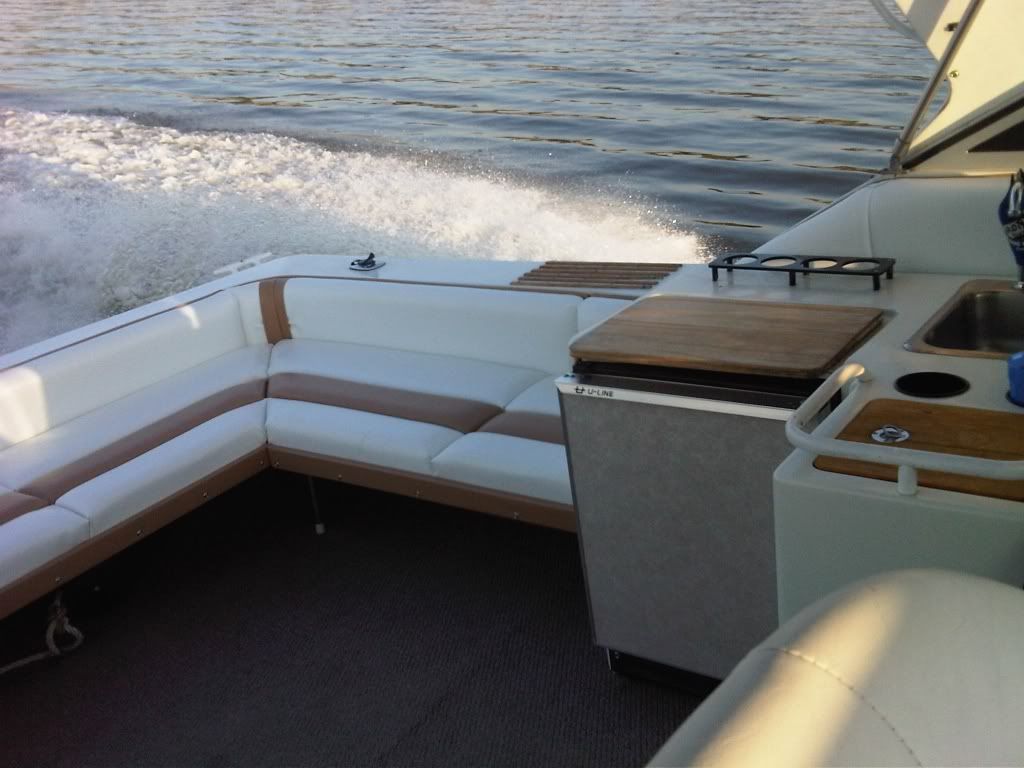
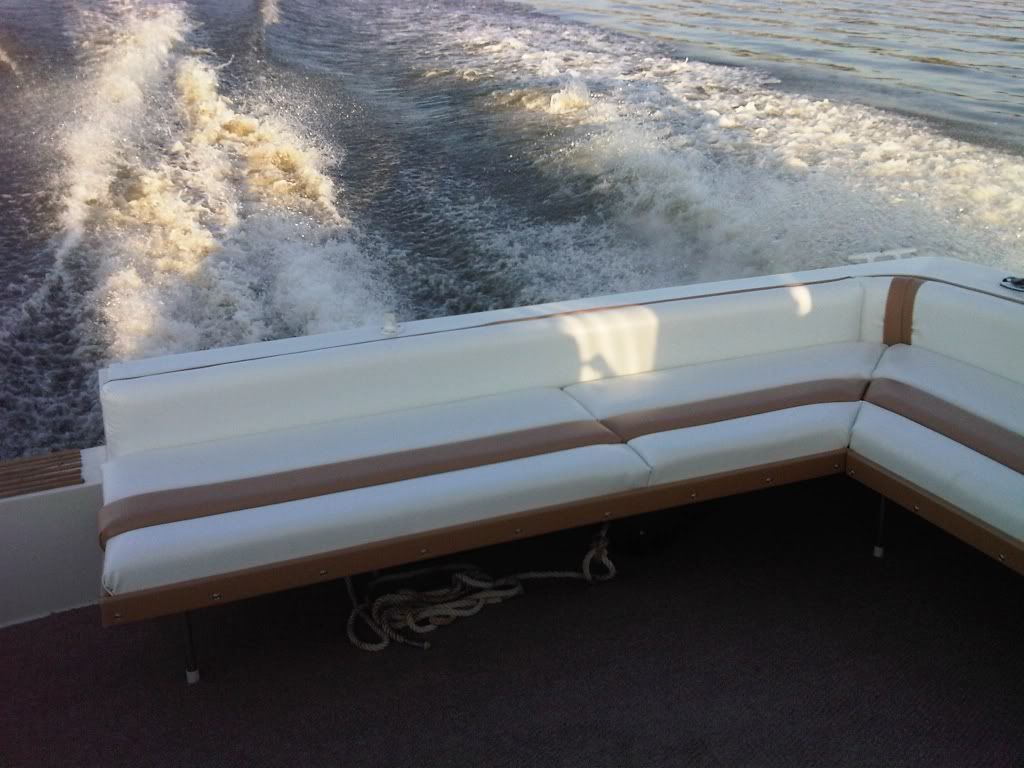
The "Piping" along the top of the side bolsters is actually1/4" plastic ice maker line. I cut long strips of vinyl about 3 inches wide. Stapled it to the bolster back, laid the ice maker line along the edge then folded the open flap of vinyl over it and stapled in place. It has held up nicely over the last two seasons and adds a nice contrast to all of that white.
I couldn't figure out how to post directly to the site so I have aded a photo bucket link.
Some of the pictures further into the album show my repaint of the vinyl covered walls downstairs as well. The glue used in the factory to hold the vinyl to the walls had begun to print through the vinyl and it was hideous. The album shows Before, during, and after shots. the Vinyl paint downstairs has held up unbelievably well espcially when you take into account two teenagers and all of their frineds being onthe boat a lot. I also recovered the mid cabin seats and seat backs with some upholstery grade fabric that kept the same color scheme going through the entire downstairs.
I can provide more details on how I did the bolsters and the back seats for anyone interested.
Enjoy.
Barry
http://s1139.photobucket.com/albums/n551/barryl1/
Posted: Wed Sep 05, 2012 6:07 pm
by Stripermann2
Posted: Wed Sep 05, 2012 6:11 pm
by BarryL
Special thanks to StriperMan for adding some of the pictures to my topic. It's magic I tell ya...
Barry
Posted: Wed Sep 05, 2012 6:28 pm
by BarryL
an added note about the rear corner's of the side bolsters. I tried to apply heat to stretch the vinyl to eliminate wrinkles but that didn't work out so well so I came up with the idea of adding the tan accent and made it kinda like a tuxedo sash to cover my sins (read lack of professional experience). In my opinion it made a nice finish to the job .
For those wondering total cost of the vinyl recover including vinyl, foam, staples, contact cement, and beer was under $700.00 and I have enough vinyl left over to do it all over again in a few years if needed.
Jo Anne fabrics continually runs sales at 50-60 even 70% off of retail for one cut of fabric so rather than try and figure out exactly what I needed and how many cuts I bought complete rolls. They will let you bring it back as long as it is uncut from what was originally purchased.
Jo Annes sells 2 grades of vinyl. what you see is the better grade which was less than 15 bucks a yard when on sale.
With a good set of hands to help this took about 3 long days from start to finish for the vinyl including mocking up and making the seat frames at the rear and another 2 .5 days for the work downstairs.
If I had to do it all over again I would have modified the seats on the port side to approach the bar area on an incline to make some sort of lounger for the ladies to get some sun on. Maybe this winter...
Each individual colored section on the seat bottoms is its own piece with individual marine plywood backing and is screwed into the base of the seat bottom from underneath with stainless steel screws for easy installation and removal if necessary so adding the lounger is a quick afternoons work. About a 12 pack i'd guess.
special note. If you are going to do this yourself be sure and add plenty of 1 inch holes in backer boards and seat bases for water and air to escape and for the foam and vinyl to be able to breath.
All in all a great project that really updated the boat.
The worst and hardest part of all the updating was removing the checked/faded/worn out side striping on the hull. 3m makes a special stripper wheel (kinda like an eraser that spins in a drill) that made removing the stripes easier than chemicals, heat gun, and nit picking but it was still a pita. but well worth the new cleaner lines and look. IF you decide on the 3m wheel remember that gel coat burns easily so keep the thing moving and don't generate too much heat. Don't ask how I figured that out.
Barry
Posted: Wed Sep 05, 2012 7:47 pm
by gettaway
Barry, nice job! did you paint the vinyl with vinyl paint? the new color looks great and I have been in a quandry as to what to do with the awful vinyl wall covering in the head.
very nic eyou should be proud !
Posted: Wed Sep 05, 2012 9:15 pm
by tsawyer
Looks great.
Where did you get the foam? Did they sell that at the fabric store?
I would not have guessed you could paint the walls downstairs.
Maybe I will try this out on my back facing seat.
Posted: Wed Sep 05, 2012 10:51 pm
by BarryL
For those who asked about painting the vinyl.
It works great on stationary vinyl with the proper prep work. I scrubbed with sop and water and a scotch brite pad to remove any oils etc... Then I wiped it down with acetone and used Rust Oleum brand vinyl and fabric paint. IT came out great and has a nice satin finish that has held up amazingly well. I used the same stuff on the seats in a convertible BMW and it looked good for a while but began to spider crack all over the place so I wouldn't trust it for seats especially on a boat. For painting in a confined space I used lots of high powered fans to keep from passing out from the fumes of the prep (Acetone) and the painting.. IT's actually intended for automotive seats so it has UV protectors etc...
The Foam? yes I got that at Joanne fabrics. I actually re-used the foam on the side bolsters but covered it with a one inch sheet of foam from Jo annes to give it a new, soft supple feel and to hide any past sins. It looks great. I was surprised how expensive the foam is for a high density product but then I learned it's all petroleum based. The back seat foam is also from Joans. I used two pieces of different density and glued them together to give it a better feel and better rebound then cut to shape with an electric knife (Yes the kind used on holidays to cut the turkey) and that worked great as well.
I used the individual sections and pretended I was gift wrapping them to give them a finished look and made sure that the seams faced down to avoid collecting water. So far it has held up amazingly well and I'm glad I didn't go with the 5-7k estimates i received for this work but wonder what I'l do when the two companion seats and the aft facing seats need recovering. Not sure if I'l modify them to match or have them professionally done (too many curves) with the vinyl I already have.
It's amazing what a little ingenuity and You tube videos can make you believe you can do. The results are clear. If iI can do it anyone can.
Barry
Posted: Sun Sep 09, 2012 7:26 pm
by yorklyn
Great job Barry! I'm the guy who's trying to figure out what to do with the seats and bolsters. I'm going to try to get a second price locally this week. If the price is too high I may give it a try after seeing your pics! thanks for posting the pics.
Posted: Mon Sep 10, 2012 1:21 pm
by sluggo
yorklyn wrote:Great job Barry! I'm the guy who's trying to figure out what to do with the seats and bolsters. I'm going to try to get a second price locally this week. If the price is too high I may give it a try after seeing your pics! thanks for posting the pics.
I had mine seats/side bolsters redone this year. the deal was I had to take them to the recover place, and I had to re-install. They charged me $3200, which i was happy with, and they did give me a hand on the install when things went a little astray. Just to give you an idea.